Replacing the mounting bracket for ground installation
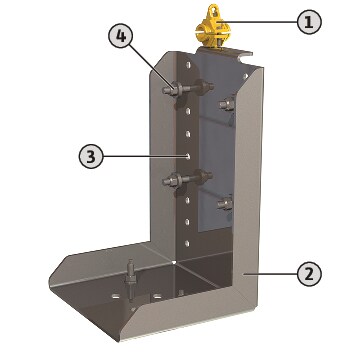
1 | Cable brackets for strain relief |
2 | Mounting bracket |
3 | Height grid |
4 | 4x fixation material: Hexagon head screw, washer, hexagon nut |
- Mixer set down on a firm surface.
- Have work carried out by two persons!
- Tools are ready for use.
- Open the cable brackets and take out the connection cable.
- Undo and remove hexagon nuts.
- Remove washers from the hexagon head screws.
- Second person: Remove mixer from the mounting bracket and hold the mixer.
- Remove hexagon head screws.
- Insert hexagon head screws in the new mounting bracket.
- Second person: Place the mixer on the hexagon head screws.
- Place washers on the hexagon head screws.
- Attach and firmly tighten hexagon nuts. Max. tightening torque: see appendix.
- Lay connection cable in the cable bracket and close the cable bracket.
- Align the connection cable: The connection cable should be slightly bent, it should not be taut.
- Close the cable brackets tightly.
- Mounting bracket is changed.